
Grow Your own Immunity Boost
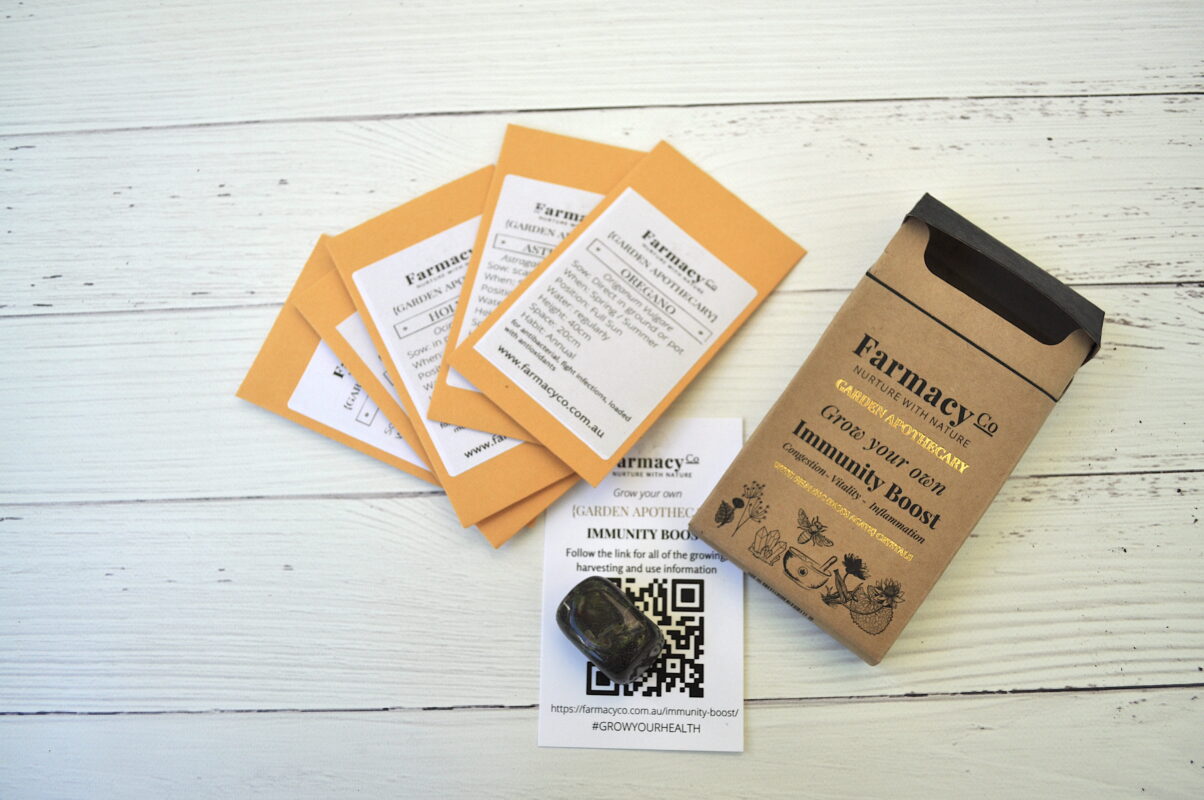
Congratulations on making the choice to Grow your health with our Garden Apothecary Immunity Boost.
In this pack you’ll find 5 different herb varieties to grow in your garden or on your balcony and Clear Quartz crystals to add a little extra magic to your plants.
Lets start with each herb and how to grow them, what they look like and how to harvest, then we’ll move onto some recipes to get the most benefit from your medicinal herbs.
Grow
TULSI
| Method: | Raise seedlings |
| Sowing Depth: | 1mm |
| When: | Spring and early summer |
| Germination: | 8-14 days @ 21-23°C |
| Hardiness / Life Cycle: | Half hardy Annual |
| Plant Spacing: | 40cm |
| Plant Height: | 30-60cm |
| Position: | Full sun, moist well drained soil |
| Days to Maturity/Flowering: | 100-110 days |
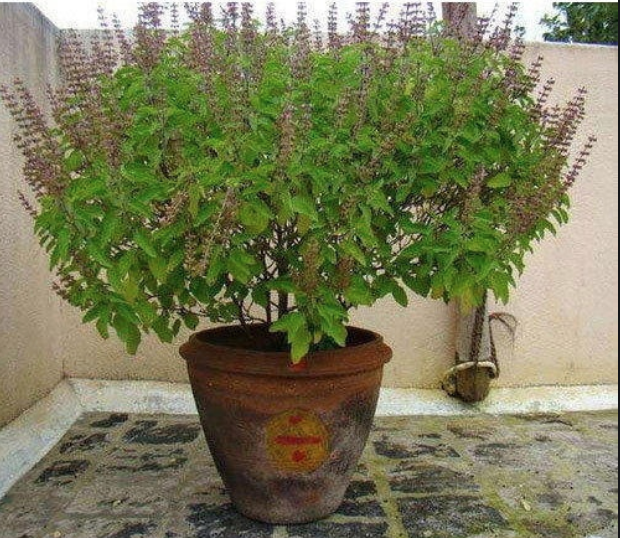
Harvest the leaves and flowers often, and pinch back blossoms to encourage more vigorous growth and dry the leaves, store in an air tight container
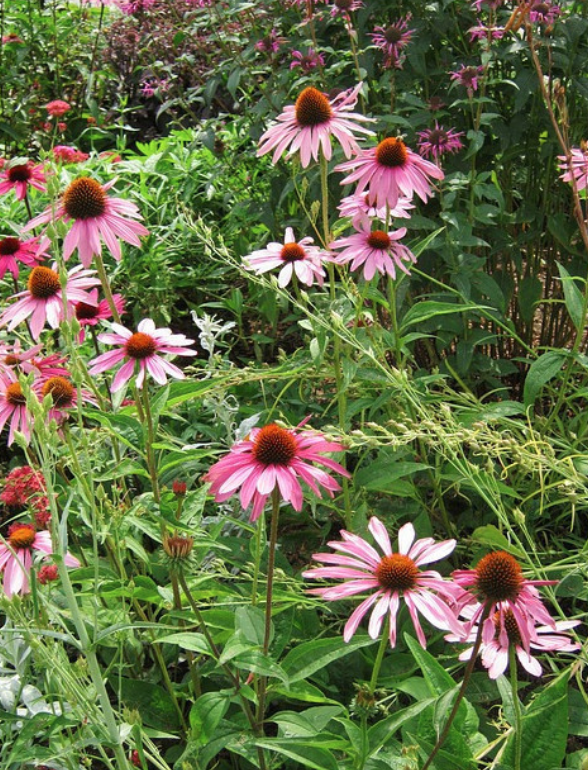
ECHINACEA
| Method: | Sow direct or raise seedlings |
| Sowing Depth: | 6mm |
| When: | Spring |
| Germination: | 10-15 days @ 18-21°C |
| Hardiness / Life Cycle: | Hardy Perennial |
| Plant Spacing: | 50cm |
| Plant Height: | 100cm |
| Position: | Part or full sun, moist well drained soil |
| Days to Maturity/Flowering: | 90-140 days |
Harvesting the aerial parts can be done in the second year of growth. Harvesting the aerial parts is as simple as cutting the stem above the lowest pair of leaves. Strip the leaves and the flower buds from the stem and lay them flat to dry. This can be done anytime during the growing season. A good time to do it is when you’re cutting back the Echinacea.Harvest the roots of a 2-3-year-old plant in the spring or the fall. E. Augustifolia has fibrous roots and E. Purpurea has a taproot. To harvest Echinacea, using a shovel or a garden fork, lift the roots out of the ground around the Echinacea plant. Now you can take pieces of the root from the root ball to harvest or you can remove the whole plant to harvest the roots. Removing the whole plant can allow you to thin out your Echinacea patch. If you choose to just harvest parts of the root ball, you can place the remaining roots back in the ground to replant.
ASTRAGALUS
| Method: | Raise seedlings – Stratify {See Below} |
| Sowing Depth: | 4mm |
| When: | Spring and summer |
| Germination: | 45 days @ 18-22°C |
| Hardiness / Life Cycle: | Hardy Perennial |
| Plant Spacing: | 60cm |
| Plant Height: | 30 cm |
| Position: | Part or full sun, moist soil |
| Days to Maturity/Flowering: | 110 days flower (500 days root harvest) |

Stratify the seeds in the refrigerator for one week. Many skullcap varieties require a period of cold to enable germination. Place seeds on a moist paper towel, put the paper towel in a ziplock bag, and place the bag in the refrigerator. Check on the seeds in the refrigerator periodically during the stratification period to ensure none grow mouldy or dry out too much. Remove the seeds from the refrigerator after the stratification period, scarify them with sandpaper and plant them in a sterilised seed mix to germinate. Water the seeds, and keep the soil moist but not soggy or waterlogged. Keep the newly planted seeds in a warm place until they sprout. HARVEST – Astragalus grown from seed requires at least two years of growth to produce rootstock of adequate size for medicine making. To collect, use a fork or needle-nose spade to extract taproot from ground, then dry.
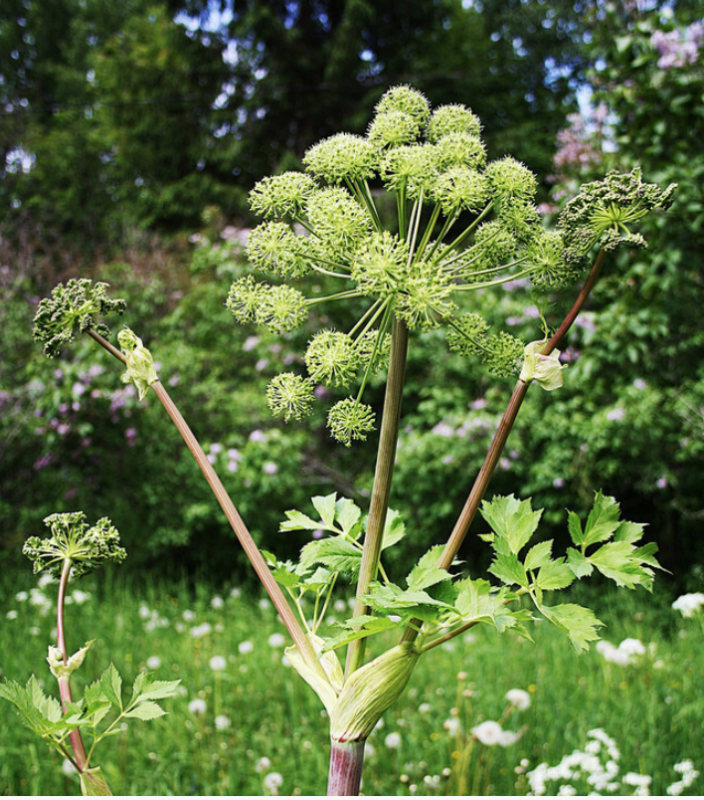
ANGELICA
| Method: | Raise seedlings or sow direct |
| Sowing Depth: | 1mm |
| When: | Spring and autumn |
| Germination: | 30-35 days @ 15-18°C |
| Hardiness / Life Cycle: | Hardy Biennial |
| Plant Spacing: | 50cm |
| Plant Height: | 200cm |
| Position: | Part shade, moist soil |
| Days to Maturity/Flowering: | 365 days |
Seeds need light to germinate. Best germinated outdoors. Seeds can be slow to germinate taking up to 6 months. Protect from aphids, slugs and snails. Susceptible to powdery mildew. Self seeding. Plants normally die after producing seed but the life of the plant can be extended 1 or more years if the flowers are removed before seeds are formed.
All parts of the plant are edible and useful.
During the first year of growth, harvest the young leaves. These can be picked at any time, but they are at their best in late spring or early summer.
To harvest, just cut off the leaves you need, leaving some intact on each plant.
A good general rule to follow when harvesting is to take only 1/3 of the leaves at a time. Pick leaves carefully, taking care not to cause damage to the main stem.
Harvest the roots in either the Autumn of the first season or early spring of the second, before the stalks have a chance to shoot up and produce flowers.
The best time to harvest roots is when a plant is directing most of its energy towards root production and growth, rather than creating flowers, fruit, or seeds.
OREGANO
| Method: | Sow direct or raise seedlings |
| Sowing Depth: | 5mm |
| When: | Spring and summer |
| Germination: | 7-14 days @ 15-25°C |
| Hardiness / Life Cycle: | Hardy Perennial |
| Plant Spacing: | 50cm |
| Plant Height: | 60cm |
| Position: | Part or full sun, moist well drained soil |
| Days to Maturity/Flowering: | 85-100 days |
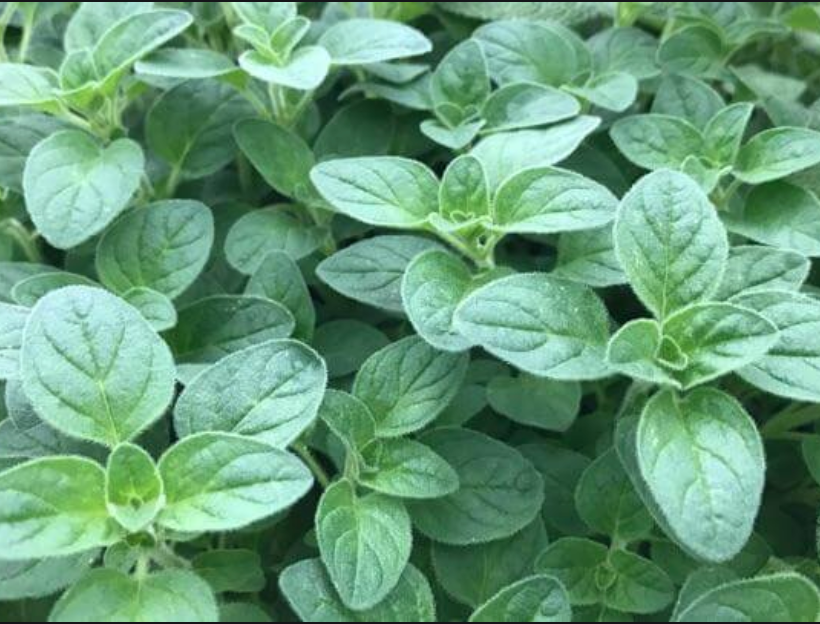
a gram of oregano has 42 times more antioxidant properties than apples since it is rich in vitamin A and C and adding fresh oregano leaves or oil to your daily diet can help boost the immune system. To obtain oregano oil, the dried flowers and leaves of the wild oregano plant are harvested when the oil content of the plant is at its highest, and then distilled. The resulting oil is golden to dark yellow, with a strong spicy odour.
HArvest
TULSI
Part Used – Leaves
How – You can begin to harvest tulsi once the plant reaches about 30cm in height. Pinch back the growing tips to help encourage a bushy plant habit, which will increase yields. Tulsi plants should be ready for harvest about 40 days after germination and do best with sparse periodic harvests. You can dry the leaves as you harvest them.
ECHINACEA
Part Used – All parts of the plant are edible, the leaves and flower buds are most commonly harvested for herbal tea. The roots can be used in tinctures and tonics.
How –
Leaves & Flowers –
Harvest coneflowers beginning in their second year. Pick leaves anytime during the flowering cycle, or harvest the flowers when the buds just begin to open.
Spread the flower buds and leaves out on a drying screen. Place them in a warm, dry room with good circulation where they aren’t exposed to intense light or heat. Dry the coneflower parts for five to seven days, or until they feel brittle and papery.
Store the dried coneflower leaves and flowers in a sealed container in a cool, dark and dry place until use.
Cut through the stem with a sharp pair of shears. Make the cut just above the lowest set of leaves for foliage harvesting, or cut above the topmost leaf set if you are only harvesting flower buds.
Roots –
ASTRAGALUS
Parts Used – Roots. Astragalus grown from seed requires at least two years of growth to produce rootstock of adequate size for medicine making.
Cut back the stems and leaves of the astragalus to the ground using pruners. This will make it easier to work around the plant. Chop up the stems and leaves and add them to a compost bin or pile, if you have one. Otherwise, just discard them.
Use a shovel to dig a shallow circle around the root of the astragalus. The plant has a taproot, a root that grows relatively straight down and deep into the soil. Remove the top layer of soil so that you can see the root. This will guide you as you dig the root the rest of the way out of the ground.
Dig deeper around the root, removing the soil from the hole. Grasp the top of the root and wiggle it to loosen it as you dig. Continue the process until the root pulls free.
Wash the astragalus root with warm water, removing all the dirt. Use a scrub brush to rid the main root of the small rootlets and clean any crevices.
Lay the root on a cutting board and slice it into about 2-3cm pieces with a sharp knife. Astragalus root resembles a thin, yellowish carrot. Dry Root and store in an airtight container.
You can also process the root by making a tincture.
ANGELICA
Parts Used –
All the parts of medicinal angelica can be harvested.
How –
Edible and spice-like roots can be harvested in Autumn even in the first year.
Stems can be harvested in spring during the second year.
It usually takes two years after sowing for the stems to be ready for harvest.
The roots of angelica are soft and fleshy, so they are not challenging to dig out. Remove some plants and leave others to flower and go to seed, harvesting no more than a third of your total crop.
OREGANO
Parts Used –
Leaves
How –
Harvest plants often for continued new growth. Begin by snipping sprigs of oregano as soon as the plant is several inches tall. The flavour of oregano is most intense in mid-summer, just before it blooms, making this the best time to harvest leaves for drying. This herb is stronger dried than fresh and should be dried for making oil at home.
USE
TULSI {Holy Basil}
Tulsi Tea
INGREDIENTS
¼ cup Dried Tulsi Leaves
2 tablespoon lemon juice
1 tablespoon honey
METHOD
- Put Tulsi leaves into a saucepan along with one and quarter cup of water.
- Boil them together, and lower the flame after 15 minutes
- Use a strainer to strain the tea from the leaves
- Add honey (do not add honey into liquid over 40deg C) and lemon juice
- Stir them well and enjoy
ECHINACEA
Echinacea Tincture
INGREDIENTS
2 Echinacea Stems (flower, stem, and roots!)
A clean glass jar with tight fitting lid
Vodka
METHOD
- Rinse the echinacea plant.
- Roughly chop the entire echinacea plant (roots, stems, flower buds).
- Place chopped echinacea into your glass container and cover with vodka. . Leave some room at the top of the container/jar. Put lid on.
- Let tincture sit in a cool dark place out of reach of kids!
- After one month minimum (two to three months is even better), strain the tincture and keep the liquid. You may keep this in the same container or transfer to small bottles with dropper lids for easy access.
- To use, place 2-4 drops in water and drink. Caution: Tincture mixture can be pretty potent!
ASTRAGALUS
Since Astragalus is a root, it is best prepared as a decoction. A decoction is made by adding one tablespoon of the root to 1 cup of water in a covered pot. Simmer the root for twenty minutes and then strain. It is important to note that the water should not boil but should be a low simmer. One of my favourite ways to prepare Astragalus is by simply adding it to soups and stews. The sliced root, which looks like a creamy yellow tongue depressor, can also be chewed on.
Astragalus & Miso Soup
Astragalus Miso Soup Recipe This is a super simple recipe to make, but one that is incredibly beneficial for immune system health. It’s also delicious and the perfect thing to curl up with in the winter. This can be drank as a morning beverage, or eaten as a simple soup before a meal. For best results, enjoy this astragalus and miso soup regularly. Any type of broth can be used for the base; you could even use water. This broth could be the start of a more complex soup. You could add sliced garlic, a sautéed onion, some strips of seaweed, fried tempeh and on and on.
INGREDIENTS
2 cups broth (bone broth, meat broth, veggie broth)
30 grams astragalus
Pinch of freshly ground black pepper
1-3 tablespoons miso
METHOD
- Place the broth, astragalus, and black pepper into a medium sized sauce pan with a tight fitting lid.
- Bring to a simmer, cover, and continue to simmer on low for 30 minutes.
- Strain the broth. You could use the astragalus again if desired, otherwise compost.
- Let the broth cool slightly, then add your desired amount of miso.
- Serve warm in a mug or as a simple soup.
ANGELICA
ANGELICA ROOT & GINGER TONIC
INGREDIENTS
170g of sliced ginger root
60g of sliced angelica root
2 cup of sugar (Jaggery is best)
2 cups of water
METHOD
- Gently boil the roots in the sugar water for 45 minutes
- Remove from heat and allow to steep for 45 minutes
- Strain root parts from syrup thru fine mesh and a strainer
- Pour tonic into a glass container. Allow to cool. Seal with a lid and store in fridge for up to one month.
OREGANO
OREGANO OIL
INGREDIENTS
Mason Jar
pot or slow cooker
dried oregano (Origanum vulgare)
a silicone trivet or folded washcloth
enough base oil to completely saturate and submerge the oregano
straining materials, like a mesh strainer lined with cheesecloth or muslin
Sterilised glass container with air-tight lid to store your finished oregano oil
METHOD
- Put your dried oregano in your mason jar.
– dried is important here for oil that will keep longer. Using fresh herbs will introduce water into your oil, and where water goes, so goes microbial and fungal growth. If you choose to use fresh herbs, store your oil in the fridge and only make enough to use it up completely within 3-4 weeks. - Fill the mason jar with your base oil of choice so that the herbs are completely saturated and submerged by 1″ or so.
– Any liquid oil will do if you’re planning on taking it internally, its personal preference.
– If you’re planing on using the oregano oil for cooking, choose an oil that has a high smoke point, like avocado or grape seed.
– For topical use, sweet almond is wonderful because it absorbs quickly and doesn’t feel greasy. - Place the jar inside your pot or slow cooker, on top of the silicone trivet or folded washcloth.
– the idea here is to have a buffer between the glass jar and the bottom of the pot that is in direct contact with the heat source. - Fill the pot or crockpot around the jar with water, being careful not to get water IN the jar.
– Fill the pot so that the water level is at least 1/2-3/4 of the way up the jar, but don’t fill it right to the top of the jar.
– If you’re using the washcloth you’ll need a bit more water than you might think because it will absorb quite a bit. - Turn the heat to LOW, and allow to infuse for a few hours, stirring the oil and herb mixture occasionally.
– If your goal is medicine making and not just a tasty oil for cooking, you’ll want to really give the oil some time to infuse…at least 4 hours, ideally overnight. This is why I like using the slow cooker method over a pot on the stove. - When you’re done infusing, remove from heat and strain the herbal material out of your oil.
– You may need to do this more than once, depending on the method you’re using to strain, and how big your pieces of oregano are. - Pour your finished oregano oil into your sterilised glass container.
– Cover and label with date and contents. Store in the refrigerator for best longevity.